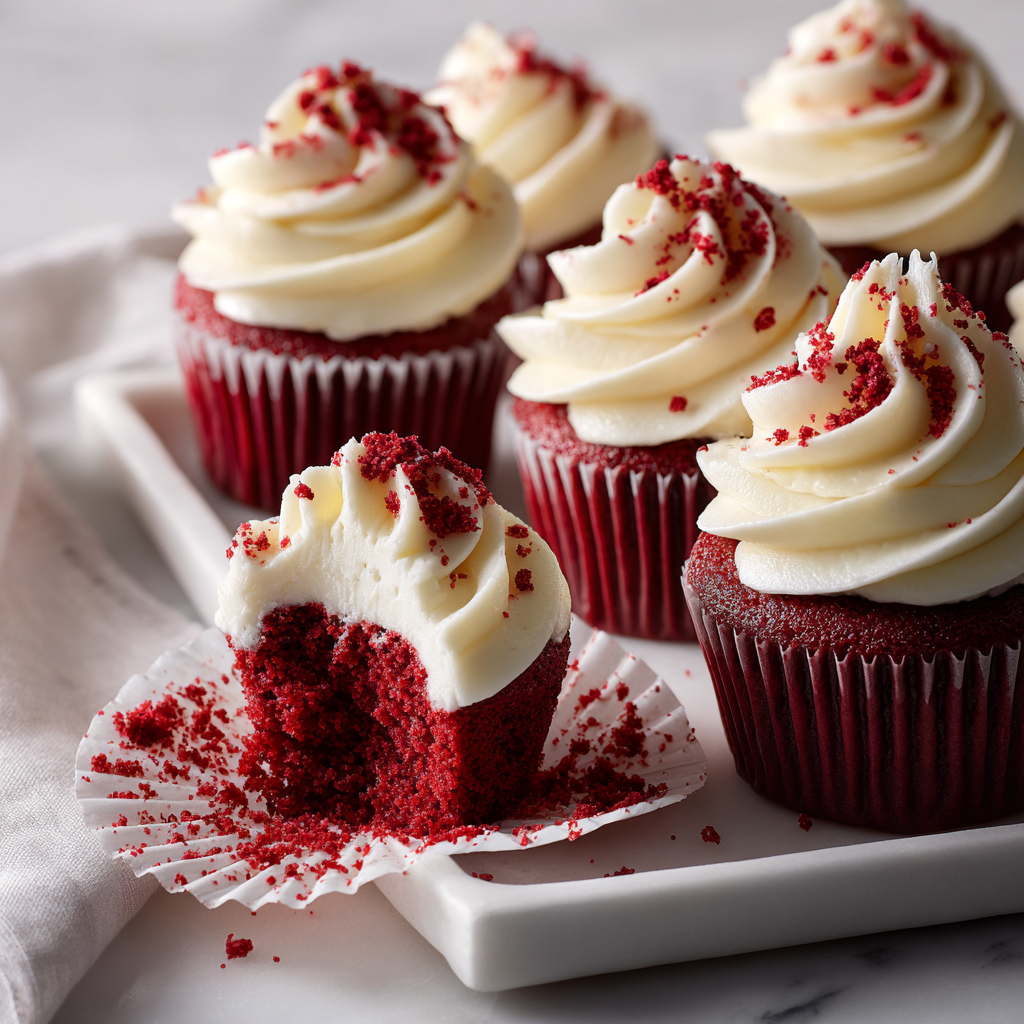
These Red Velvet Cupcakes with Cream Cheese Frosting capture the timeless elegance of America’s most beloved dessert with their stunning crimson color, tender crumb, and luxurious tangy frosting. Each cupcake delivers the perfect balance of subtle cocoa flavor, moist texture, and rich cream cheese topping that has made red velvet a celebration staple for generations.
Imagine biting into a cupcake so tender and moist it practically melts in your mouth, with a gorgeous deep red color that catches the eye and a flavor profile that’s uniquely sophisticated – not quite chocolate, not quite vanilla, but something wonderfully in between. The crowning glory is the cloud of tangy cream cheese frosting that provides the perfect counterpoint to the cake’s sweetness, creating a dessert that’s both nostalgic and eternally elegant.
What makes these red velvet cupcakes truly special is their authentic American bakery heritage and the science behind their distinctive characteristics. The slight acidity from buttermilk and vinegar reacts with cocoa to enhance the red color naturally, while creating an incredibly tender crumb structure. This recipe honors the classic techniques that have made red velvet cakes a symbol of Southern hospitality and special occasion celebrations across America.
🌟 Why These Classic Cupcakes Will Become Your Signature Dessert
- ✔️ 45-minute bakery perfection — Create professional-quality cupcakes with stunning presentation faster than a trip to the bakery.
- ✔️ Incredibly moist texture — Buttermilk and oil combination creates cupcakes that stay tender for days without drying out.
- ✔️ Authentic American classic — Traditional recipe techniques that honor the heritage and flavor profile of genuine red velvet.
- ✔️ Stunning visual impact — Gorgeous deep red color and elegant cream cheese swirls create Instagram-worthy presentation.
- ✔️ Perfect for all occasions — From Valentine’s Day to Christmas, birthdays to weddings, these cupcakes suit any celebration.
- ✔️ Foolproof technique — Clear instructions and professional tips ensure success even for novice bakers.
- ✔️ Make-ahead friendly — Components can be prepared separately and assembled for fresh presentation when needed.
🧬 The Fascinating History and Science of Red Velvet
Red velvet cake has a storied American history dating back to the Victorian era, when “velvet” cakes were prized for their fine, tender crumb achieved through specific ingredient ratios and techniques. The red color originally came from the natural reaction between acidic ingredients (buttermilk and vinegar) and cocoa powder, which would turn reddish-brown. During the Great Depression and World War II, when ingredients were scarce, bakers began adding red food coloring to enhance the dramatic color that made these cakes so special.
From a baking science perspective, red velvet’s signature texture comes from the careful balance of acid and fat. The buttermilk’s acidity tenderizes the gluten in flour while reacting with baking soda to create lift. The combination of oil and butter provides moisture retention and flavor complexity. The small amount of cocoa powder adds depth without overpowering, while the vinegar enhances both color and tenderness. This chemical symphony creates a cake that’s distinctly different from chocolate or vanilla – it’s uniquely red velvet.
🛒 Complete Ingredients List
For the Red Velvet Cupcakes:
- 2½ cups all-purpose flour — Sifted for light texture; avoid over-measuring for tender results
- 1½ cups granulated sugar — Creates structure and sweetness; don’t substitute with alternatives
- 1 tsp baking soda — Provides lift when activated by acidic ingredients
- 1 tsp salt — Enhances flavors and strengthens gluten structure
- 1 tbsp unsweetened cocoa powder — Dutch-processed preferred for smooth flavor and color
- 1½ cups vegetable oil — Creates moist texture; canola or neutral oil works best
- 1 cup buttermilk, room temperature — Essential for tenderness and tangy flavor
- 2 large eggs, room temperature — Provide structure and richness
- 2 tbsp red food coloring — Gel coloring preferred for intense color without thinning batter
- 1 tsp white vinegar — Reacts with baking soda and enhances red color
- 1 tsp vanilla extract — Pure vanilla for best flavor
For the Classic Cream Cheese Frosting:
- 8 oz cream cheese, softened — Full-fat for best flavor and texture; must be room temperature
- ½ cup unsalted butter, softened — Room temperature for smooth mixing
- 4 cups powdered sugar, sifted — Sifting prevents lumps and creates silky texture
- 1 tsp vanilla extract — Pure vanilla extract for authentic flavor
- ⅛ tsp salt — Balances sweetness and enhances cream cheese tang
- 2-3 tbsp heavy cream — For achieving perfect piping consistency
For Professional Decoration:
- Red velvet cake crumbs — From trimmed cupcake tops for authentic garnish
- White chocolate shavings — For elegant contrast and texture
- Fresh berries — Strawberries or raspberries for color and freshness
- Edible pearls or sprinkles — For special occasion elegance
- Cream cheese frosting rosettes — Piped decoratively for bakery-style presentation
Essential Baking Equipment:
- Standard cupcake/muffin tin — 12-cup capacity for even baking
- Paper cupcake liners — High-quality liners that won’t peel away from cakes
- Electric mixer — Stand mixer preferred, but hand mixer works
- Large mixing bowls — Multiple bowls for separating wet and dry ingredients
- Piping bags and tips — For professional frosting application
👩🍳 Step-by-Step Instructions for Perfect Red Velvet Cupcakes
Preparation & Equipment Setup (10 minutes):
- Preheat and prepare: Preheat oven to 350°F (175°C). Line a 12-cup muffin tin with paper cupcake liners. This temperature ensures even baking without over-browning.
- Bring ingredients to room temperature: Remove eggs, buttermilk, cream cheese, and butter from refrigerator 30-60 minutes before baking. Room temperature ingredients combine more easily and create better texture.
- Sift dry ingredients: Sift flour, cocoa powder, baking soda, and salt together twice to ensure even distribution and eliminate lumps. This creates the signature fine crumb.
- Prepare wet ingredients station: Measure oil, buttermilk, food coloring, vinegar, and vanilla into separate containers for easy combining.
Creating the Perfect Red Velvet Batter (15 minutes):
- Cream sugar and oil: In a large bowl, whisk together sugar and oil until well combined. Unlike traditional cakes, red velvet uses oil for moisture, so thorough mixing is important.
- Add eggs one at a time: Beat in eggs one at a time, mixing well after each addition. This ensures proper emulsification and smooth batter texture.
- Incorporate color and flavor: Mix in red food coloring, vanilla, and vinegar until evenly distributed. The batter should be a vibrant red color.
- Alternate dry and wet ingredients: Add sifted dry ingredients in three additions, alternating with buttermilk in two additions. Begin and end with flour mixture. Mix just until combined – overmixing creates tough cupcakes.
- Final batter check: The batter should be smooth, deep red, and pourable but not too thin. If needed, add 1-2 tablespoons more flour for proper consistency.
Baking to Perfection (20 minutes):
- Fill cupcake liners properly: Divide batter evenly among prepared liners, filling each about ⅔ full. This allows room for rising without overflow.
- Bake with precision: Bake for 18-22 minutes, rotating pan halfway through for even browning. Cupcakes are done when a toothpick inserted in center comes out with just a few moist crumbs.
- Cool strategically: Cool in pan for 5 minutes, then transfer to wire rack to cool completely. This prevents condensation from making bottoms soggy while ensuring proper cooling.
- Prepare for frosting: Ensure cupcakes are completely cool before frosting – warm cupcakes will melt the cream cheese frosting.
Creating Silky Cream Cheese Frosting (10 minutes):
- Beat cream cheese until fluffy: In a large bowl, beat softened cream cheese with electric mixer until completely smooth and fluffy, about 3-4 minutes. No lumps should remain.
- Add butter gradually: Add softened butter and beat until combined and fluffy, about 2 minutes. The mixture should be pale and light.
- Incorporate powdered sugar: Add sifted powdered sugar one cup at a time, beating well after each addition. Start on low speed to prevent sugar clouds, then increase to medium-high.
- Perfect the consistency: Add vanilla, salt, and 2 tablespoons heavy cream. Beat until smooth and pipeable. Add more cream if needed for desired consistency.
- Final texture check: Frosting should hold peaks but be smooth enough to pipe. If too thick, add cream; if too thin, add more powdered sugar gradually.
Professional Assembly & Decoration (10 minutes):
- Prepare piping setup: Transfer frosting to piping bag fitted with large star tip (Wilton 1M works beautifully). Twist top of bag to prevent frosting from escaping.
- Pipe professional rosettes: Starting from outside edge of cupcake, pipe frosting in circular motion toward center, building up to create beautiful rosette effect.
- Add elegant finishing touches: Sprinkle with red velvet cake crumbs, add white chocolate shavings, or top with fresh berries for stunning presentation.
- Chill for optimal serving: Refrigerate frosted cupcakes for 15-30 minutes to set frosting, then bring to room temperature 10 minutes before serving for best flavor and texture.
✨ Serving Suggestions & Celebration Presentation
- 💕 Valentine’s Day romance: Present on elegant cake stands with rose petals scattered around for romantic dinner party or intimate celebration dessert.
- 🎄 Christmas holiday styling: Garnish with white chocolate snowflakes or silver dragées for festive winter celebration presentation.
- 👰 Wedding and bridal shower elegance: Create tower displays with fresh flowers and pearl accents for sophisticated bridal celebration centerpieces.
- 🎂 Birthday party perfection: Arrange with colorful sprinkles and birthday candles for classic American birthday celebration tradition.
- ☕ Coffee shop pairing: Serve alongside strong coffee or espresso to balance the sweetness and enhance the subtle cocoa flavors.
- 🥛 Classic American serving: Pair with cold milk for the traditional American bakery experience that highlights the cake’s heritage.
🔄 Creative Variations & Flavor Adaptations
- 🍫 Double chocolate red velvet: Increase cocoa powder to 3 tablespoons and add mini chocolate chips for chocolate lovers who want more cocoa intensity.
- 🧁 Mini red velvet bites: Use mini muffin tins for bite-sized party treats perfect for large gatherings or elegant cocktail parties.
- 🍓 Strawberry cream cheese variation: Add freeze-dried strawberry powder to frosting for natural strawberry flavor and enhanced pink color.
- 🥥 Coconut red velvet fusion: Add shredded coconut to batter and coconut extract to frosting for tropical twist on the classic.
- ☕ Mocha red velvet: Add 1 tablespoon instant espresso powder to dry ingredients for sophisticated coffee shop-style flavor profile.
- 🌰 Cream cheese alternatives: Try mascarpone frosting for ultra-rich Italian-inspired variation, or Swiss meringue buttercream for lighter texture.
- 🎨 Natural coloring version: Use beet juice powder or natural red food coloring for those preferring to avoid artificial additives.
💡 Professional Baking Tips for Bakery-Quality Results
- 🌡️ Temperature precision: Use an oven thermometer to ensure accurate temperature. Red velvet requires precise heat for proper rise and texture development.
- ⚖️ Measuring accuracy: Use kitchen scale for flour measurement when possible. Too much flour creates dense, dry cupcakes; too little creates collapsed tops.
- 🥛 Buttermilk substitute: If you don’t have buttermilk, add 1 tablespoon lemon juice to 1 cup whole milk and let sit 5 minutes before using.
- 🌈 Color consistency secrets: Use gel food coloring for vibrant color without thinning batter. Liquid coloring can affect texture and requires more volume.
- ⏰ Timing for success: Don’t open oven door until minimum baking time is reached. Temperature fluctuations can cause cupcakes to sink or bake unevenly.
- 🧈 Frosting temperature control: All frosting ingredients must be at room temperature for smooth mixing. Cold ingredients create lumpy, difficult-to-pipe frosting.
- 💨 Mixing technique mastery: Mix batter just until ingredients are combined. Overmixing develops gluten, creating tough, dense cupcakes instead of tender ones.
- 📏 Even portion control: Use ice cream scoop or measuring cup to ensure uniform cupcake sizes for even baking and professional presentation.
🧊 Storage, Make-Ahead & Party Planning Guide
Optimal Storage Methods:
- ❄️ Refrigeration guidelines: Store frosted cupcakes covered in refrigerator for up to 5 days. Unfrosted cupcakes keep at room temperature for 3 days.
- 🌡️ Serving temperature: Remove from refrigerator 15-20 minutes before serving for optimal flavor and texture. Cold cupcakes mute flavors.
- 📦 Container selection: Use airtight containers with high lids to prevent frosting damage, or store in cupcake carriers for transport.
Make-Ahead Strategies:
- 🍰 Component preparation: Bake cupcakes up to 2 days ahead and store unfrosted. Make frosting day of serving for best texture and appearance.
- ❄️ Freezing guidelines: Unfrosted cupcakes freeze for up to 3 months. Wrap individually and thaw at room temperature before frosting.
- 🎉 Party planning timeline: Bake cupcakes morning of party, frost 2-4 hours before serving, and add final decorations just before presentation.
Transportation & Gift-Giving:
- 🚗 Safe transport: Use cupcake carriers or boxes with secure lids. Keep level and avoid temperature extremes during transport.
- 🎁 Gift presentation: Package in beautiful bakery boxes with windows to showcase the stunning red color and elegant frosting work.
- 💌 Special occasion packaging: Add themed decorations, ribbons, or cards that match the celebration for personalized gift giving.
Quality Maintenance:
- 🌡️ Temperature stability: Avoid temperature fluctuations that can cause condensation and soggy bottoms or melted frosting.
- 💧 Moisture control: Place parchment paper between layers when stacking to prevent sticking and maintain frosting integrity.
- 🎨 Color preservation: Store away from strong odors and direct light to maintain vibrant red color and fresh flavor.
❓ Comprehensive FAQ Section
- Why did my cupcakes turn out dense instead of fluffy?
This usually indicates overmixing the batter or using too much flour. Mix just until ingredients are combined, and measure flour by spooning into cup and leveling off. - Can I make these without food coloring?
Yes, but they won’t have the signature red color – they’ll be more brown. The flavor will still be authentic red velvet. Try natural alternatives like beet juice powder. - Why is my cream cheese frosting too runny?
The cream cheese or butter may have been too warm, or you may have added too much liquid. Chill the frosting for 30 minutes, then re-whip. - Can I substitute the buttermilk?
You can make buttermilk substitute by adding 1 tablespoon lemon juice to 1 cup whole milk. The acidity is important for both flavor and texture. - How do I get the perfect red color?
Use gel food coloring rather than liquid, and add gradually until you achieve your desired shade. Natural cocoa powder also affects the final color. - Can I make these as a layer cake instead?
Absolutely! Divide batter between two 9-inch round pans and bake for 25-30 minutes. Adjust frosting quantity accordingly for layer cake assembly. - Why do my cupcakes have a dome or sink in the middle?
Domed tops indicate oven too hot or too much leavening. Sinking suggests underbaking, too much liquid, or opening oven door too early. - How far in advance can I make these for a party?
Bake cupcakes up to 2 days ahead and store unfrosted. Frost the day of serving for best appearance and texture. - What’s the best way to get smooth, professional-looking frosting?
Ensure all ingredients are room temperature, sift powdered sugar, and beat frosting for several minutes until completely smooth before piping.
Create Timeless American Bakery Magic 🇺🇸
These Red Velvet Cupcakes with Cream Cheese Frosting represent the very best of American baking traditions, combining stunning visual appeal with incredible flavor and texture. Every bite delivers the perfect balance of tender cake, subtle cocoa notes, and rich, tangy frosting that has made red velvet a beloved dessert for generations of celebrations.
The beauty of these cupcakes lies in their timeless appeal and versatility. Whether you’re celebrating Valentine’s Day, Christmas, a birthday, or just want to bring bakery-quality treats to your table, these red velvet cupcakes deliver both elegance and comfort. They prove that some classics never go out of style – they just get better with each generation that discovers their magic.
Ready to master one of America’s most beloved desserts? These red velvet cupcakes are about to become your signature treat that everyone requests for every special occasion!