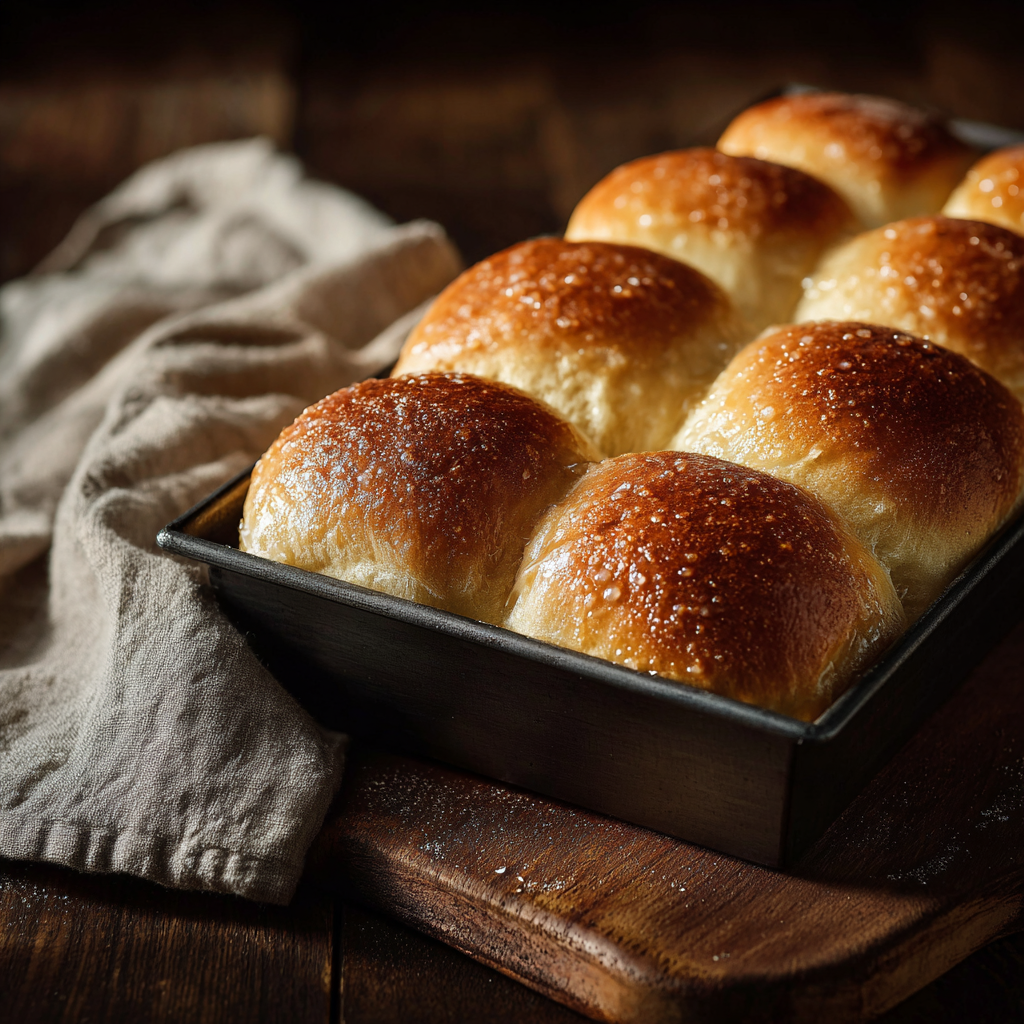
These Homemade Soft and Fluffy Dinner Rolls represent the pinnacle of comfort baking, creating pillowy clouds of buttery perfection that transform any meal into a special occasion. With their golden-brown exterior giving way to an impossibly tender, pull-apart interior, these rolls embody everything we love about fresh-baked bread—the intoxicating aroma, the satisfying texture, and the pure joy of breaking warm bread with loved ones.
Picture pulling apart a roll so soft and airy that it practically melts on your tongue, revealing layers of buttery goodness that have been carefully developed through proper kneading, rising, and baking techniques. These aren’t just dinner rolls—they’re edible memories waiting to be made, the kind of bread that guests remember long after the meal ends. The secret lies in understanding how yeast, gluten, and butter work together to create structure while maintaining that coveted tender crumb that makes each bite irresistible.
What makes these dinner rolls truly exceptional is their foolproof nature and remarkable versatility that guarantees success for bakers of all skill levels. Whether you’re preparing for Thanksgiving dinner, hosting a dinner party, or simply wanting to elevate a weeknight meal, these rolls deliver consistent, bakery-quality results using simple ingredients and time-tested techniques. The dough is forgiving, the shaping is straightforward, and the final result is nothing short of spectacular—golden, buttery rolls that embody the very essence of homemade comfort.
🌟 Why These Dinner Rolls Will Become Your Signature Baking Achievement
- ✔️ Foolproof success guaranteed — Step-by-step techniques ensure perfect results every time, even for beginning bakers tackling yeast bread for the first time.
- ✔️ Incredibly soft and fluffy texture — Special enriched dough creates rolls so tender they practically melt in your mouth while maintaining perfect structure.
- ✔️ Make-ahead friendly convenience — Dough can be prepared up to 24 hours in advance, making holiday meal planning stress-free and manageable.
- ✔️ Impressive presentation factor — Beautiful golden-brown rolls create restaurant-quality presentation that elevates any meal from ordinary to memorable.
- ✔️ Versatile serving applications — Perfect for holidays, dinner parties, or everyday meals, adaptable to both casual and elegant dining occasions.
- ✔️ Superior to store-bought quality — Fresh, warm homemade rolls surpass any commercial option in taste, texture, and aromatic appeal.
- ✔️ Cost-effective luxury — Creates premium bakery-quality results using affordable pantry staples, delivering exceptional value for special occasions.
🍞 The Heritage & Science Behind Perfect Dinner Roll Creation
Dinner rolls have graced American tables since the colonial period, evolving from European bread-making traditions into distinctly American comfort food staples. The development of enriched yeast doughs—incorporating eggs, butter, and milk—transformed simple bread into luxurious dinner accompaniments that became centerpieces of holiday celebrations and family gatherings. These soft rolls represent the culmination of generations of home baking wisdom, where technique and tradition combine to create bread that’s both nourishing and soul-satisfying.
The science behind perfect dinner rolls involves understanding the complex interactions between yeast fermentation, gluten development, and fat incorporation. Yeast converts sugars into carbon dioxide, creating the bubbles that give rolls their airy structure, while proper kneading develops gluten networks that trap these gases for optimal rise. The addition of eggs provides structure and richness, butter creates tenderness and flavor, and milk adds proteins that contribute to the golden-brown crust. The key is balancing these elements through proper mixing, controlled fermentation, and precise baking to achieve that perfect combination of soft interior and golden exterior.
🛒 Premium Ingredients for Bakery-Quality Results
🌾 Essential Bread Foundation:
- 4 cups bread flour — High-protein bread flour creates superior gluten development for optimal texture and structure in yeast breads.
- 2¼ teaspoons active dry yeast (1 packet) — Fresh, active yeast for reliable rising power and clean flavor development.
- 2 tablespoons granulated sugar — Feeds yeast for fermentation while adding subtle sweetness that complements butter flavors.
- 1½ teaspoons kosher salt — Enhances flavor and controls yeast activity for proper dough development and taste balance.
🥛 Rich Dairy Components:
- 1 cup whole milk, warmed — Full-fat milk for richness and tenderness, heated to 110°F for optimal yeast activation.
- 6 tablespoons unsalted butter, melted — European-style butter for superior flavor and texture, cooled slightly before use.
- 2 large eggs, room temperature — Free-range eggs for richness, structure, and beautiful golden color in finished rolls.
- Additional 2 tablespoons butter — For brushing tops before and after baking for glossy, golden finish.
🌟 Optional Flavor Enhancements:
- 1 tablespoon honey — Optional addition for subtle sweetness and enhanced browning during baking.
- 1 teaspoon vanilla extract — Adds depth and warmth that complements the buttery flavors beautifully.
- Flaky sea salt for finishing — Sprinkle on top before baking for gourmet touch and flavor contrast.
- Fresh herbs (rosemary, thyme) — Optional aromatic additions for savory variations and sophisticated flavor profiles.
🧈 Essential Equipment & Tools:
- Stand mixer with dough hook — Makes kneading effortless and ensures proper gluten development for perfect texture.
- Large mixing bowls — For rising dough and accommodating expansion during fermentation process.
- 9×13-inch baking pan — Provides proper spacing for rolls to rise and bake evenly with attractive presentation.
- Kitchen thermometer — Ensures milk temperature accuracy for optimal yeast activation and dough success.
- Clean kitchen towels — For covering dough during rising periods to prevent drying and ensure proper fermentation.
👨🍳 Master Baker’s Step-by-Step Technique
🌡️ Yeast Activation & Initial Mixing (15 minutes):
- Activate yeast properly: Warm milk to 110°F (43°C) and sprinkle yeast over surface. Add 1 tablespoon sugar and let sit 5-10 minutes until foamy and active.
- Prepare wet ingredients: In large bowl, whisk together melted butter (cooled slightly), eggs, remaining sugar, and activated yeast mixture until smooth.
- Combine dry ingredients: In separate bowl, whisk together bread flour and salt, ensuring even distribution for consistent dough development.
- Form initial dough: Add flour mixture to wet ingredients and stir with wooden spoon until shaggy dough forms and no dry flour remains.
🥖 Kneading & Gluten Development (12 minutes):
- Knead to perfection: Using stand mixer with dough hook, knead on medium speed for 8-10 minutes until dough is smooth, elastic, and slightly tacky.
- Test gluten development: Perform windowpane test—stretch small piece of dough; it should be thin enough to see through without tearing.
- Adjust consistency: If too sticky, add flour 1 tablespoon at a time; if too dry, add warm milk 1 teaspoon at a time.
- Final dough check: Properly kneaded dough should be smooth, elastic, and spring back when poked gently with finger.
⏰ First Rise & Shaping (90 minutes):
- Prepare for rising: Place dough in greased large bowl, turning to coat all surfaces with oil to prevent sticking.
- Create ideal environment: Cover with damp towel and place in warm, draft-free location for first rise (75-80°F is ideal).
- Monitor first rise: Let rise 60-75 minutes until doubled in size—time varies with temperature and humidity conditions.
- Punch down gently: Deflate risen dough with gentle punches to release gases while preserving some structure.
- Divide and shape: Turn onto lightly floured surface and divide into 12 equal pieces using bench scraper or knife.
- Shape into rolls: Form each piece into smooth ball by tucking edges underneath and rolling gently on unfloured surface.
🔥 Final Rise & Baking Excellence (45 minutes):
- Arrange for baking: Place shaped rolls in greased 9×13-inch pan, spacing evenly for uniform rising and baking.
- Second rise timing: Cover with damp towel and let rise 30-40 minutes until puffy and nearly doubled in size.
- Preheat oven: Heat oven to 375°F (190°C) during final 15 minutes of second rise for optimal baking temperature.
- Pre-bake brush: Gently brush tops with melted butter for golden color and prevent over-browning during baking.
- Bake to perfection: Bake 15-18 minutes until golden brown on top and internal temperature reaches 190°F (88°C).
- Final butter brush: Immediately brush hot rolls with remaining melted butter for glossy finish and enhanced flavor.
- Cool briefly: Let cool in pan 5 minutes before serving warm for optimal texture and temperature.
🍽️ Elegant Serving Suggestions & Presentation Ideas
- 🦃 Holiday feast centerpiece: Serve warm in lined basket for Thanksgiving, Christmas, and Easter dinners where homemade bread elevates the entire meal experience.
- 🧈 Compound butter pairings: Offer herb butter, honey butter, or cinnamon butter for interactive dining that lets guests customize their bread experience.
- 🍯 Sweet accompaniments: Serve with local honey, fruit preserves, or apple butter for breakfast or brunch applications that showcase versatility.
- 🍲 Soup and stew companion: Perfect for soaking up hearty stews, chili, or creamy soups where the soft texture complements rich flavors beautifully.
- 🥗 Salad course enhancement: Smaller portions work beautifully with salad courses, providing satisfying contrast to fresh, crisp vegetables.
- 🎁 Gift-worthy presentation: Package in decorative bags or baskets for hostess gifts that show thoughtfulness and homemade care.
🔄 Creative Variations & Flavor Adventures
- 🌿 Herb-infused sophistication: Add fresh rosemary, thyme, or sage to dough for savory rolls that complement roasted meats and elegant dinners.
- 🧄 Garlic parmesan indulgence: Incorporate minced garlic and grated Parmesan for bold flavors that pair beautifully with Italian cuisine.
- 🌰 Whole wheat heartiness: Replace half the bread flour with whole wheat for nutty flavor and added nutrition without sacrificing softness.
- 🧀 Cheese-stuffed surprise: Wrap small cube of cheese in each roll for melted centers that create delightful surprises in every bite.
- 🍯 Sweet cinnamon swirl: Roll dough with cinnamon-sugar mixture for breakfast rolls that bridge the gap between bread and pastry.
- 🥓 Bacon herb combination: Fold in crispy bacon bits and chives for savory rolls that work perfectly for brunch or dinner.
- 🌙 Crescent shape elegance: Shape into crescents instead of rounds for more formal presentation and easier individual serving.
🎓 Professional Bread Baking Secrets & Troubleshooting
- 🌡️ Temperature precision mastery: Use thermometer for milk temperature—too hot kills yeast, too cold prevents activation. 110°F is the sweet spot for optimal fermentation.
- ⏰ Rise time flexibility: Dough can rise slowly in refrigerator overnight for enhanced flavor development and convenient timing for busy schedules.
- 🥖 Kneading technique perfection: Properly kneaded dough should be smooth and elastic, passing the windowpane test for optimal gluten development.
- 💧 Humidity awareness: Humid days may require extra flour; dry days may need additional liquid. Adjust gradually for perfect dough consistency.
- 🔥 Oven positioning strategy: Bake on center rack for even browning, rotating pan halfway through if oven has hot spots for uniform results.
- 🧈 Butter temperature timing: Melted butter should be cooled slightly to prevent killing yeast or melting other ingredients prematurely.
- 📏 Uniform shaping importance: Equal-sized pieces ensure even baking—use kitchen scale for precision or divide dough systematically.
- ⏲️ Doneness testing technique: Internal temperature of 190°F ensures fully baked interior while maintaining soft, tender texture throughout.
📦 Storage Mastery & Make-Ahead Excellence
Optimal Storage Conditions:
- 🌡️ Room temperature storage: Store in airtight container for up to 3 days at room temperature, maintaining softness without refrigeration.
- 🔄 Reheating perfection: Warm in 300°F oven for 5-8 minutes to restore fresh-baked texture and aromatic appeal.
- 💧 Moisture maintenance: Place slice of bread in container to maintain moisture levels and prevent rolls from drying out over time.
Make-Ahead Strategies:
- ❄️ Refrigerator rise method: Shape rolls and refrigerate overnight, bringing to room temperature and rising before baking for convenient timing.
- 🥶 Freezer preparation: Freeze shaped unbaked rolls on baking sheet, then store in bags up to 3 months for future use.
- ⏰ Holiday timing strategy: Prepare dough day before, refrigerate after first rise, then shape and bake on serving day for stress-free entertaining.
Freezing & Long-term Storage:
- ❄️ Baked roll freezing: Cool completely, wrap individually, and freeze up to 3 months, thawing at room temperature before reheating.
- 🎯 Portion control planning: Freeze in meal-sized portions for convenient reheating without waste or quality loss.
- 🔥 From-frozen baking: Bake frozen shaped rolls directly, adding 5-10 minutes to baking time for perfectly fresh results.
Gift-Giving Excellence:
- 🎁 Hostess gift preparation: Bake in disposable aluminum pans with reheating instructions for thoughtful, homemade gifts.
- 📝 Recipe sharing: Include recipe cards with gifts so recipients can recreate the experience and continue the tradition.
- 🏠 Neighborhood sharing: Double recipes for holiday sharing, spreading homemade goodness throughout your community.
❓ Complete Dinner Roll Baking Mastery FAQ
- 🌡️ How do I know if my yeast is still active?
Active yeast will foam and bubble within 5-10 minutes when mixed with warm milk and sugar. If no activity occurs, the yeast is dead and should be replaced. - ⏰ Can I make the dough ahead of time?
Yes! After first rise, punch down and refrigerate up to 24 hours. Bring to room temperature, shape, rise again, and bake for fresh results. - 🥖 Why are my rolls dense instead of fluffy?
Common causes include old yeast, insufficient kneading, over-flouring, or not allowing adequate rise time. Ensure all ingredients are fresh and techniques are followed precisely. - 🌡️ What if my kitchen is too cold for rising?
Create warm environment by preheating oven to 200°F, turning off, and placing dough inside with door slightly open. Alternative: place bowl on top of warm appliances. - 🧈 Can I use salted butter instead of unsalted?
Yes, but reduce added salt by half to prevent over-salting. Unsalted butter provides better control over final flavor balance. - 📏 How do I get uniformly sized rolls?
Weigh divided dough pieces on kitchen scale for precision, or use measuring cup to ensure equal portions before shaping into balls. - 🔥 What if my rolls are browning too quickly?
Cover loosely with aluminum foil during last 5-10 minutes of baking to prevent over-browning while ensuring interior cooks completely. - ❄️ Can I freeze the dough before shaping?
Absolutely! Freeze after first rise, thaw overnight in refrigerator, then shape, rise, and bake as directed for convenient meal planning. - ⏲️ How do I know when rolls are perfectly done?
Rolls should be golden brown on top and sound hollow when tapped on bottom. Internal temperature should reach 190°F for fully baked interior.
Your Gateway to Homemade Bread Mastery 🍞
These Homemade Soft and Fluffy Dinner Rolls represent more than just bread—they’re an invitation to create lasting memories through the timeless art of home baking. Every golden roll embodies the satisfaction that comes from mastering fundamental techniques, using quality ingredients, and sharing the fruits of your labor with those you care about most.
Whether you’re preparing for holiday celebrations, weekend family dinners, or simply wanting to fill your home with the incomparable aroma of fresh-baked bread, these rolls deliver the kind of results that build confidence and create traditions. The techniques you’ll master here—from yeast activation to proper kneading—will serve as the foundation for countless future baking adventures.
Ready to discover the unmatched satisfaction of pulling warm, homemade rolls from your own oven? These soft and fluffy dinner rolls are about to become your signature recipe for turning ordinary meals into extraordinary memories!