No-Bake Chocolate Peanut Butter Bars 🍫🥜
Craving a dessert that’s rich, creamy, and requires zero oven time? These No-Bake Chocolate Peanut Butter Bars are a dream come true. With a buttery peanut butter base and a luscious chocolate topping, this indulgent treat is easy to make and even easier to love. 💚
Why You’ll Love These Bars 💚
- ✅ Completely No-Bake: No oven, no fuss—perfect for warm weather days.
- ✅ Only 6 Ingredients: Simple pantry staples, no fancy tools required.
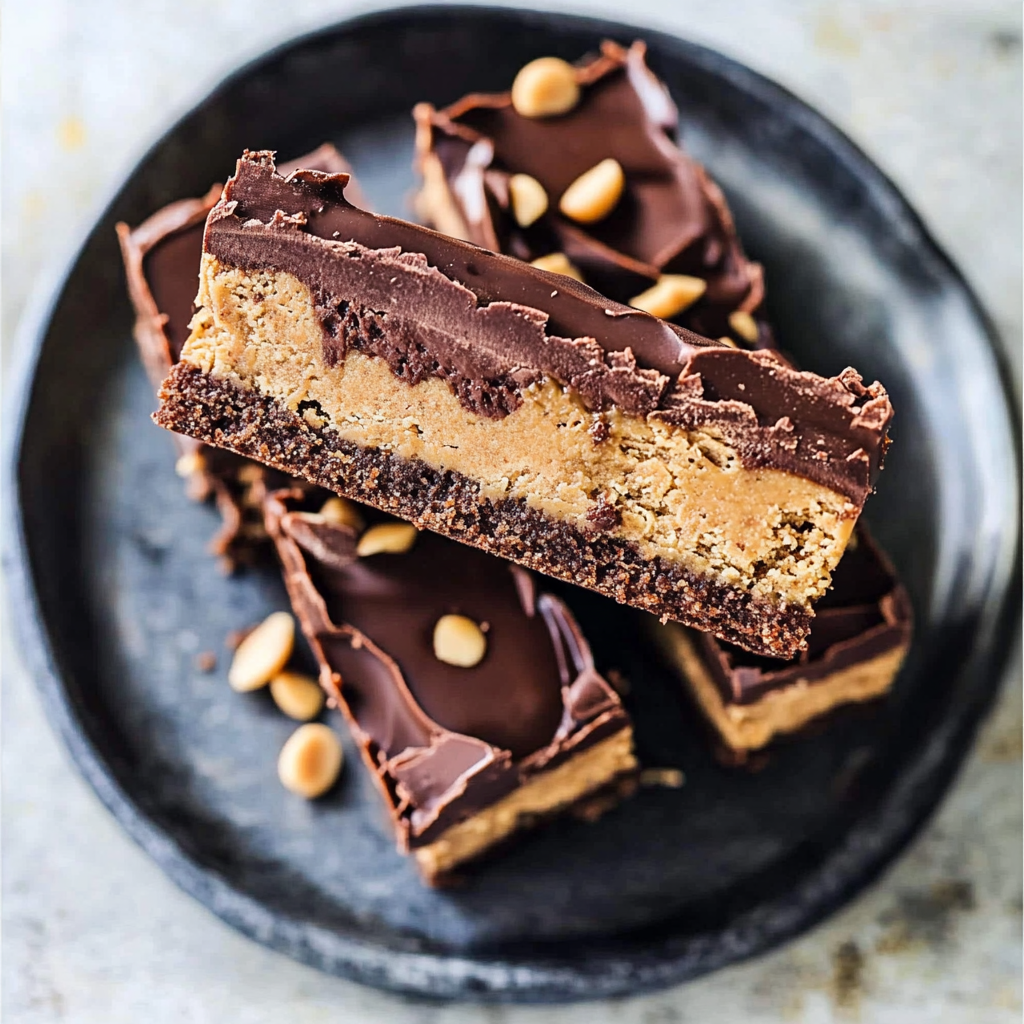
- ✅ Perfect Texture: Creamy, dense, and topped with smooth chocolate.
- ✅ Freezer-Friendly: Keep extras chilled for instant dessert any time.
🍫 Chocolate Peanut Butter Bars Recipe
Ingredients
- 1 cup creamy peanut butter (natural or conventional) 🥜
- ½ cup unsalted butter, melted 🧈
- 1½ cups graham cracker crumbs (about 10 full sheets) 🍪
- 1 cup powdered sugar 🍬
- 1½ cups semi-sweet chocolate chips 🍫
- 2 tbsp peanut butter (for chocolate layer) 🥄
👩🍳 Step-by-Step Instructions (Expanded)
- Prepare the pan:
Line an 8×8-inch or 9×9-inch square baking dish with parchment paper, leaving a little overhang for easy removal. Set aside. - Make the peanut butter base:
- In a medium bowl, combine 1 cup peanut butter and melted butter. Stir until smooth.
- Add graham cracker crumbs and powdered sugar. Mix thoroughly until a thick, even dough forms.
- Press the mixture evenly into the bottom of the prepared pan using a spatula or clean hands.
- Smooth the top and place in the fridge while you prepare the chocolate layer.
- Make the chocolate topping:
- In a microwave-safe bowl, combine chocolate chips and 2 tablespoons peanut butter.
- Microwave in 30-second intervals, stirring between each, until melted and smooth (about 1–1½ minutes).
- Pour the chocolate mixture over the chilled peanut butter base. Use a spatula to spread evenly.
- Chill the bars:
Place the pan in the refrigerator for at least 2 hours, or until the chocolate layer is firm and the bars are set. - Slice and serve:
Once firm, lift the bars from the pan using the parchment overhang. Slice into squares using a warm knife for clean edges. Serve chilled or at room temp!
💡 Tips & Variations
- ✨ Make them vegan: Use dairy-free butter and vegan chocolate chips.
- ✨ Crunchy version: Use crunchy peanut butter or stir in chopped peanuts.
- ✨ Graham-free option: Swap in almond flour or oat flour for a gluten-free base.
- ✨ Decorate: Sprinkle flaky sea salt or chopped peanuts over the chocolate before chilling.
🥜 Nutritional Benefits
While indulgent, these bars also deliver satisfying energy thanks to protein-rich peanut butter and fiber from the graham base. Making them at home allows you to skip preservatives, control sugar, and add healthier ingredient swaps.
🧊 Make-Ahead & Storage Tips
- ✅ Fridge: Store in an airtight container for up to 7 days.
- ✅ Freezer: Freeze for up to 2 months—just separate layers with parchment paper.
- ✅ Best served: Slightly chilled, for firm texture and clean layers.
❓ Frequently Asked Questions
Can I use natural peanut butter?
Yes, but make sure it’s well-stirred and not too runny. You may need to chill the base a bit longer before topping.
What if I don’t have graham crackers?
You can use crushed digestive biscuits, vanilla wafers, or almond flour as a great alternative.
Can I double the recipe?
Absolutely! Use a 9×13-inch pan and double all ingredients for a bigger batch.
Creamy, Chocolatey, and Completely Irresistible 💚
Made these bars? 🍫💬 I’d love to hear what you thought in the comments or see your creations on Pinterest! Whether for a party tray or a treat-yourself night, this dessert is always a win.